Hurricanes and Spitfires of the Western Desert, 1942–1943
Every photograph in this archive that shows an aircraft itself — rather than the men who flew
and serviced them — is gathered here, in one place, identified as far as the prints allow: by
type, by squadron code letters where they're visible, and by whatever else the handwritten
captions preserve. Most come from the Guy A. Wood Jr. scrapbook pages placed throughout
Chapter Three: The Desert War; each entry below links back
to its full context there. Cameras were officially discouraged in the desert theater — one
reason the family's own John Riley apologized for the print quality of a wartime photo he
mailed home decades later, explaining that aircrew were told not to photograph their aircraft
at all. That makes every one of these images a small act of rule-breaking, and worth a closer
look.
A note on squadron codes: 417 Squadron's own unit code, painted on the
fuselage beside the roundel, was AN (see the
Squadron History page). Of the coded aircraft
photographed in this collection, only one — the Sunoco-marked Spitfire below — carries that
"AN" code. The Hurricanes are coded "HO," and the crash-landed Spitfire below is coded "VO."
Neither matches 417's own code, which suggests those particular photographs may show a
different unit's aircraft — quite possibly one Guy Wood Sr., the scrapbook's original
compiler, was posted to himself, separately from whatever brought him into contact with 417
Squadron and Koplitz. This isn't confirmed, but it's a pattern worth keeping in mind across
the photographs below.
Hurricanes in the Desert
417 Squadron flew the Hawker Hurricane only briefly — Mk IIB and IIC models, from September
1942 to January 1943 — before converting fully to the Spitfire. The Hurricanes photographed
here carry the code "HO," not 417's "AN," so they most likely belonged to a different squadron
entirely, photographed by the album's compiler independent of his connection to 417.
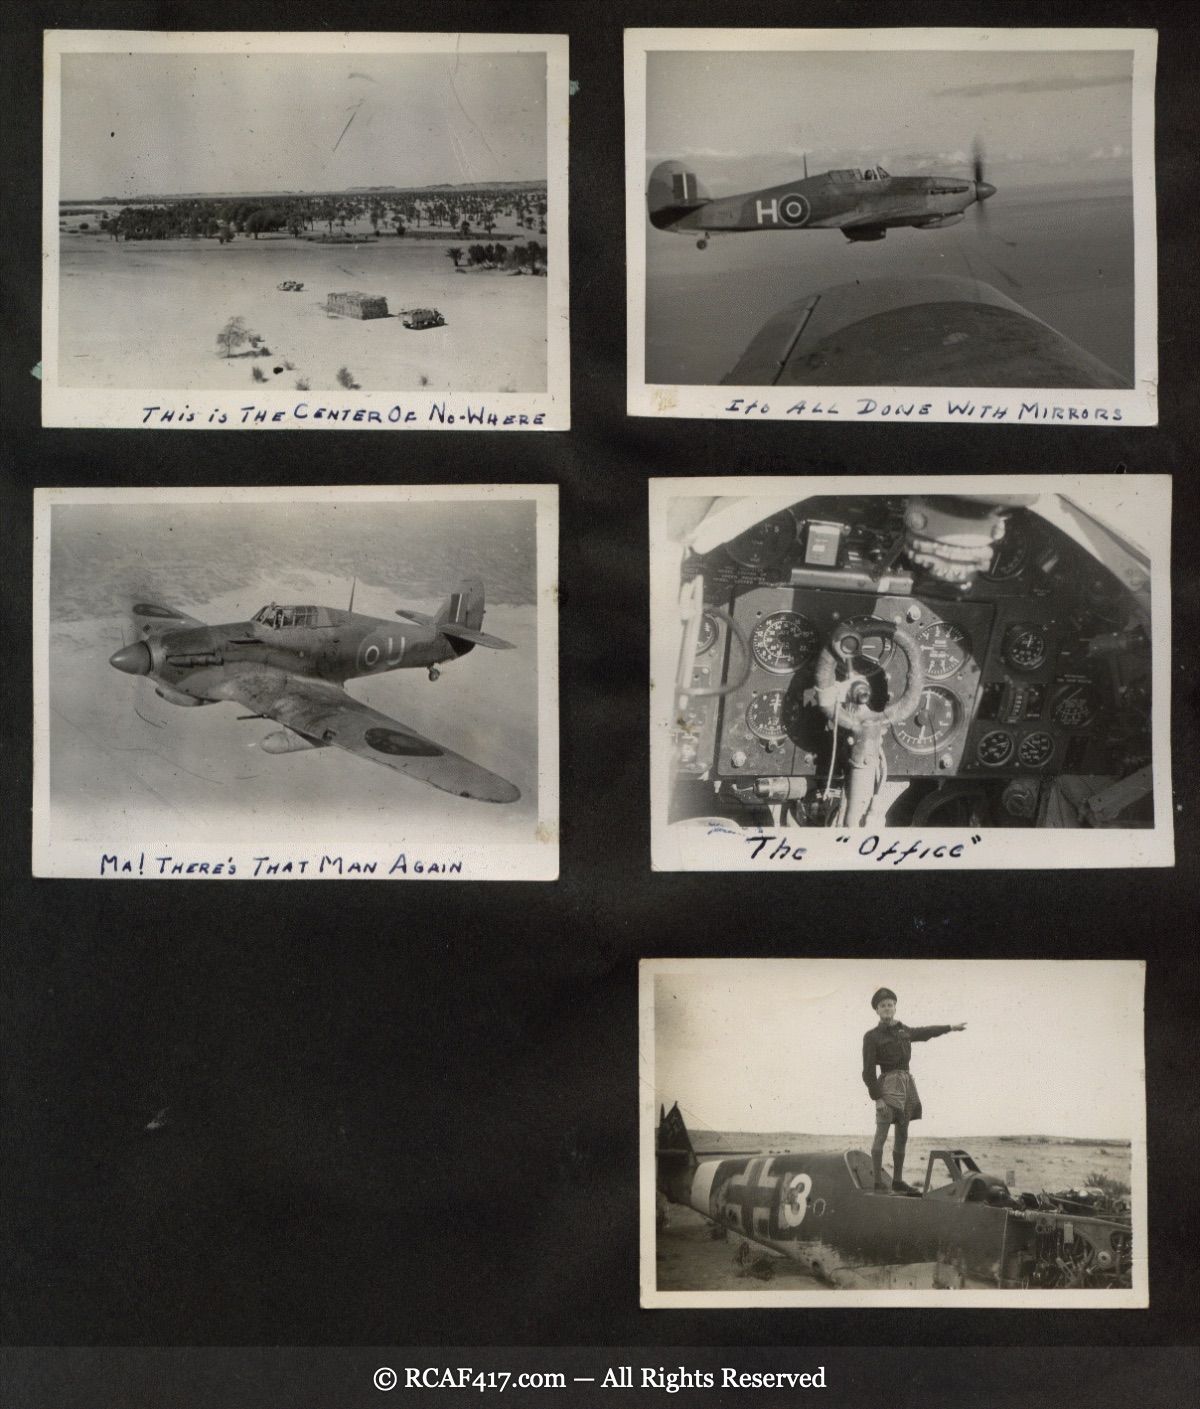
Two Hawker Hurricanes banking over open desert, coded "HO" ("It's All Done With Mirrors")
and "U" ("Ma! There's That Man Again"); a cockpit instrument panel labeled "The Office"; and
an airman standing atop a wrecked, captured enemy aircraft marked with a large "3" —
possibly a downed German or Italian machine claimed as a trophy. See it in context in
Chapter Three.
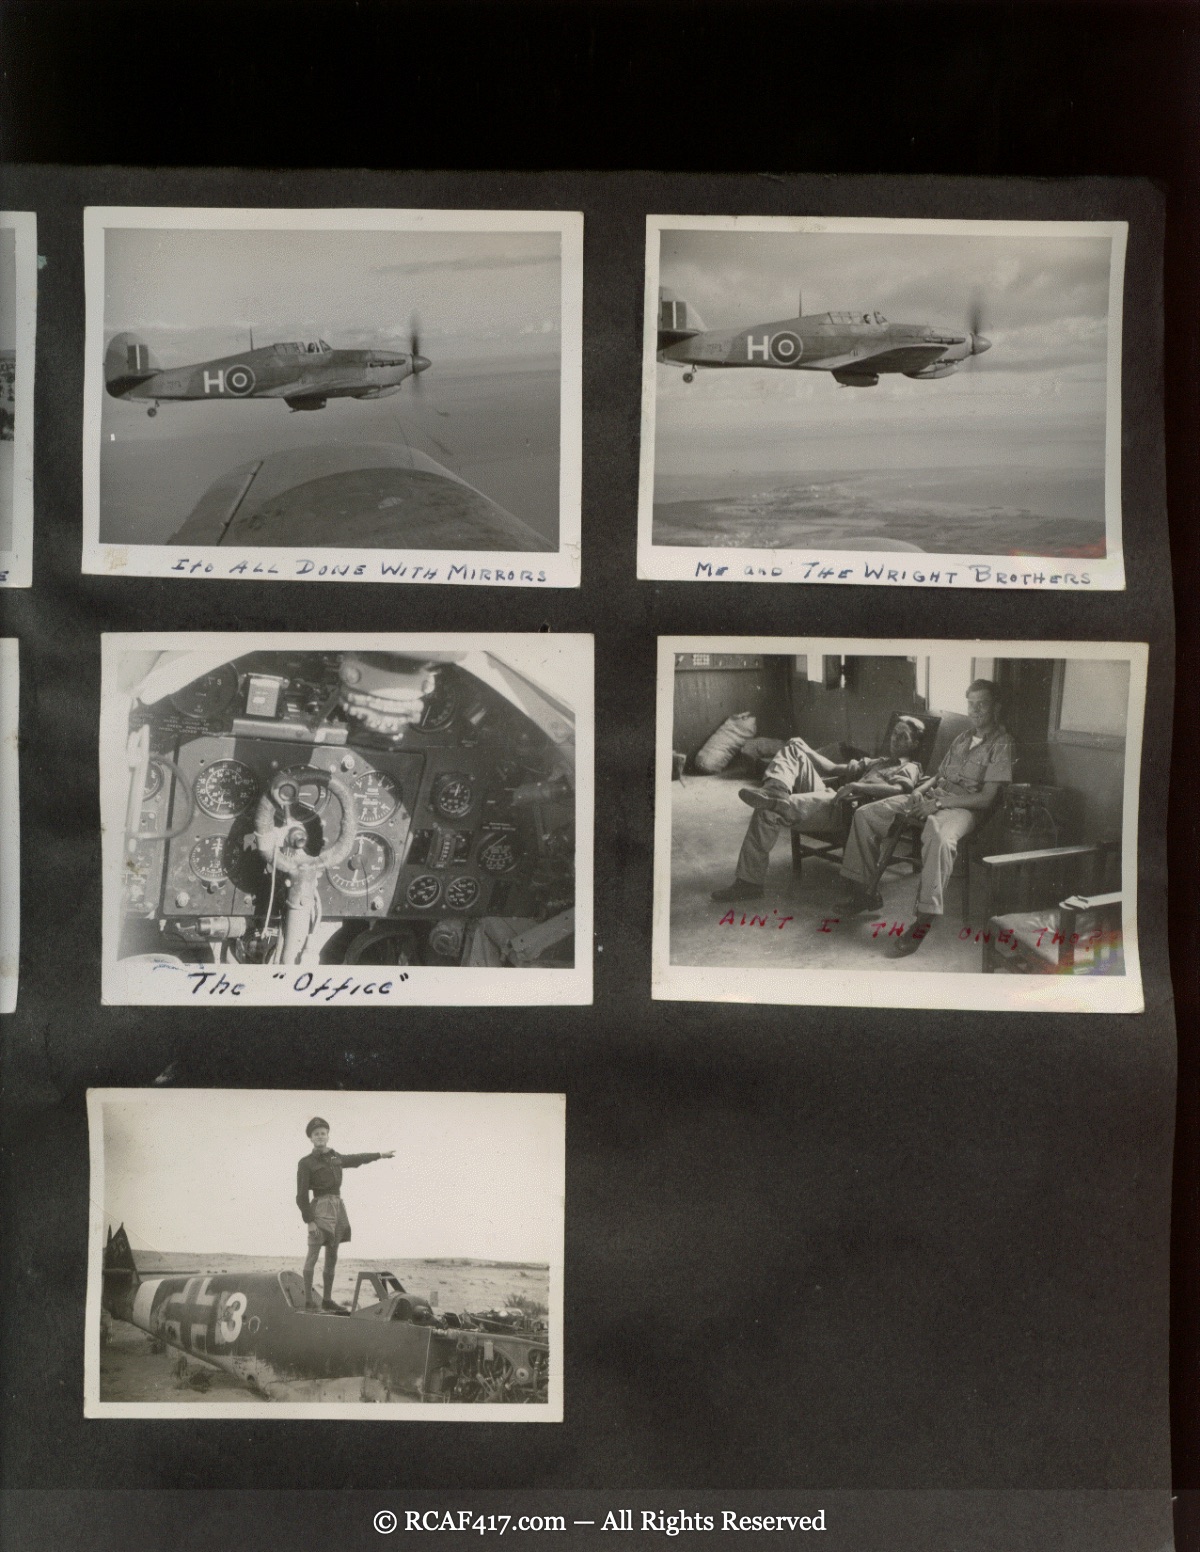
A companion page: a third Hurricane in flight, "Me and the Wright Brothers," alongside
repeated shots of the "HO"-coded Hurricane, the cockpit, and the captured wreck from the
page above. See it in context in Chapter Three.
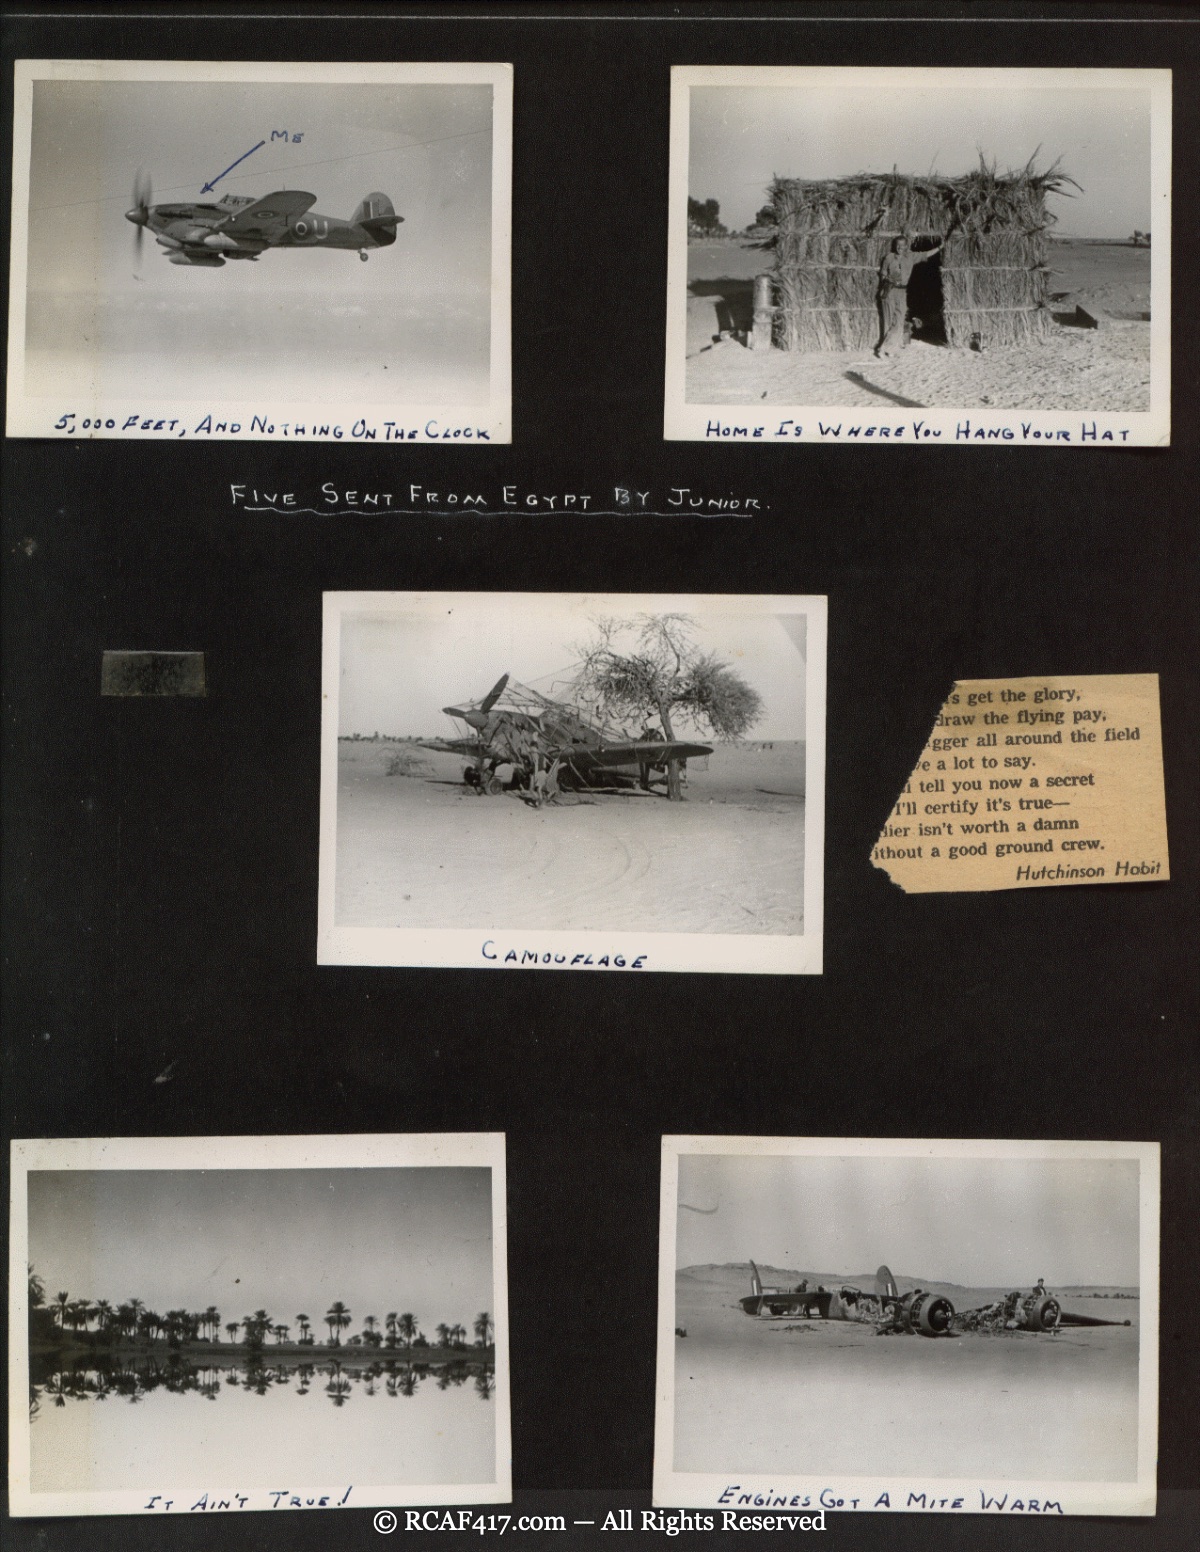
From the album page "Five sent from Egypt by Junior": a single-engine fighter climbing away
from the camera, captioned "5,000 Feet, and Nothing on the Clock" — likely a Hurricane,
consistent with the squadron's aircraft in this period, though no code letters are legible;
and, elsewhere on the same page, a wrecked aircraft draped in camouflage netting under a
tree ("Camouflage") and a badly damaged twin-engine aircraft ("Engines Got a Mite Warm") —
possibly a transport or bomber lost to enemy action or a hard landing. See the full page in
context in Chapter Three.
Spitfires in the Desert
417 Squadron flew the Spitfire Mk Vb and Vc from October 1942, the type Koplitz would have
flown through the rest of the desert campaign. These photographs are undated on their prints,
but their subject matter — camouflage discipline, nose art, and the everyday wear of desert
flying — fits squarely within that period.
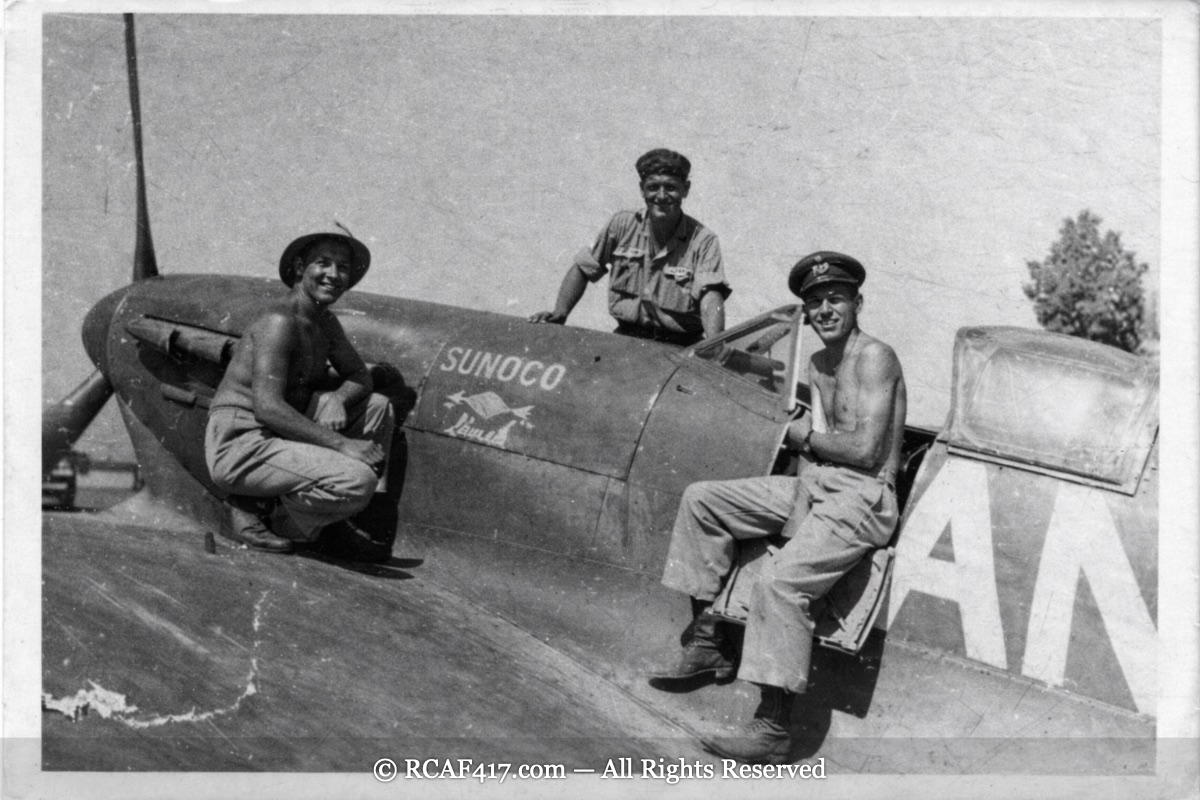
A Spitfire marked "SUNOCO" beneath a winged emblem on the nose, with the squadron code
letters "AN" visible on the fuselage — the one aircraft in this collection confirmed as
417's own by its code. Two shirtless airmen and a ground crewman relax on the wing; no names
are given. See it in context in Chapter Three.
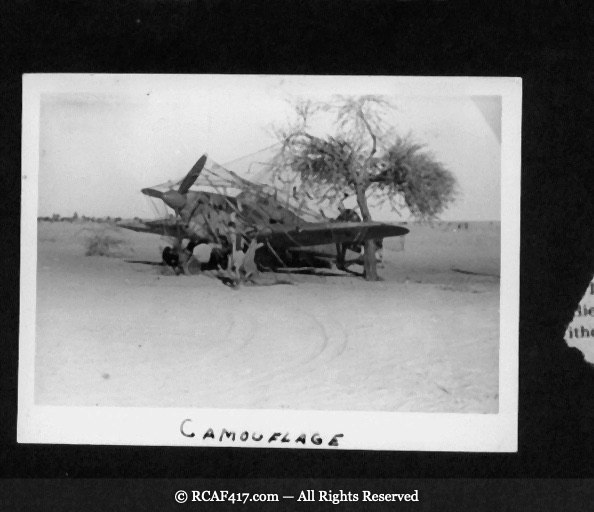
A Spitfire disguised under netting and brush at a desert airfield, captioned simply
"Camouflage" — a reminder of how exposed aircraft were on open desert strips, and how much
effort went into hiding them from air reconnaissance between sorties. See it in context in
Chapter Three.
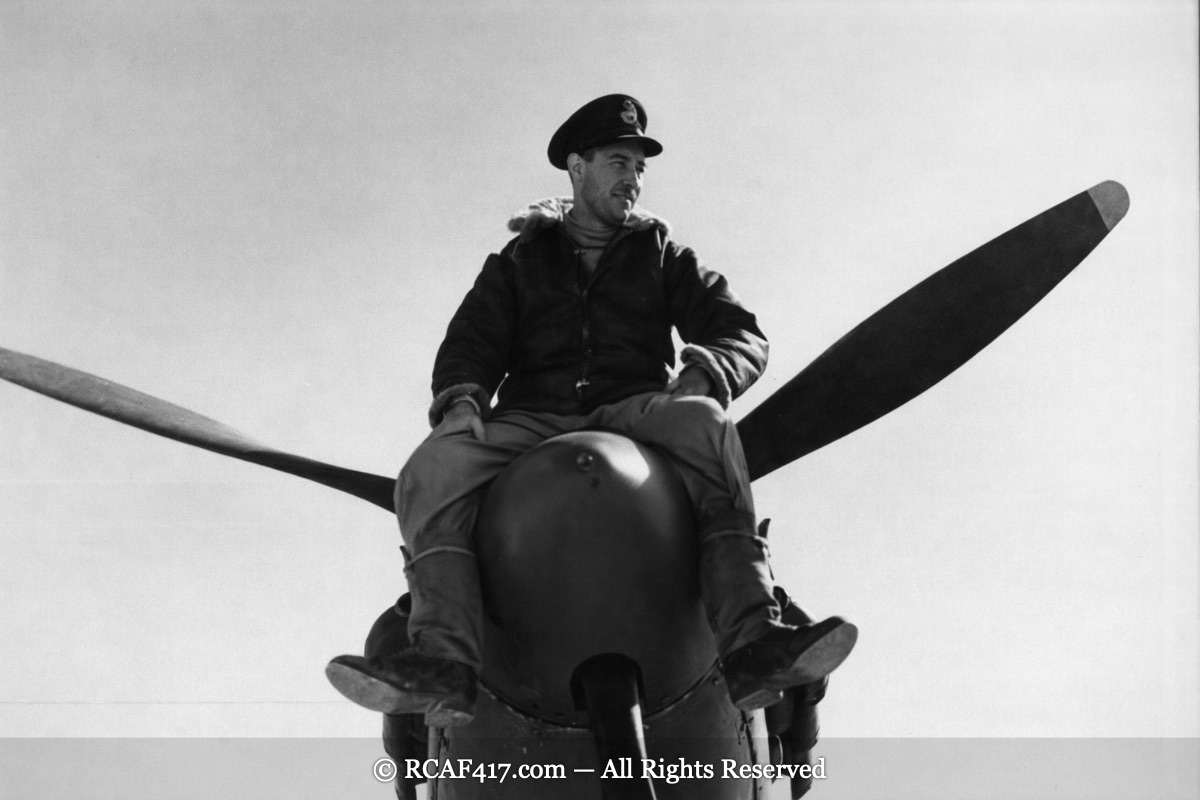
A pilot posed on the nose of his Spitfire — a classic wartime portrait style, and one of the
rare surviving Spitfire photographs from the squadron's time in the desert, since cameras
were routinely confiscated and photographs of aircraft destroyed under wartime security
rules. Confirmed as Flight Lieutenant Stuart Allan Corbett — not Koplitz
himself — by Corbett's own RCAF Certificate of Service, resolving a question that had been
open on this site for a while. See it in context, with the certificate, in
Chapter Three.
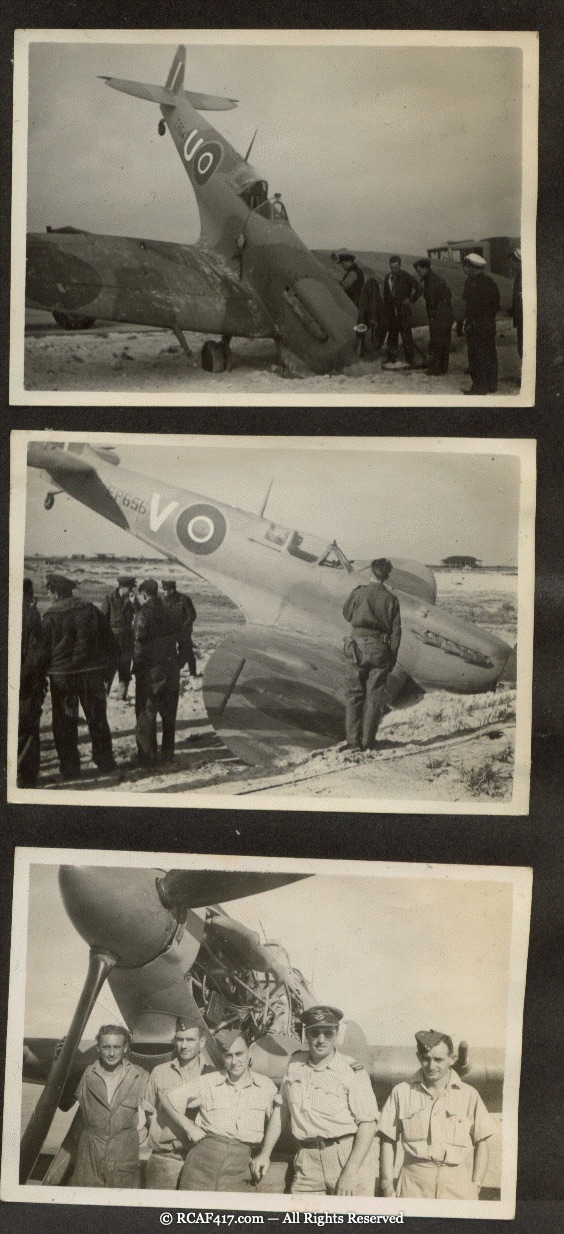
A crash-landed Spitfire, serial EP656, coded "VO," collapsed on its belly
with airmen and ground crew gathered around it — three photos on the album page, the last
showing five men posed in front of the wreck. The "EP" serial block is generally consistent
with Spitfire Mk Vb aircraft built in 1941–42, in keeping with the type the squadron flew in
Egypt, though "VO" isn't 417's own code, so this particular aircraft likely belonged to
another unit. No names are given for the men. See it in context in
Chapter Three.
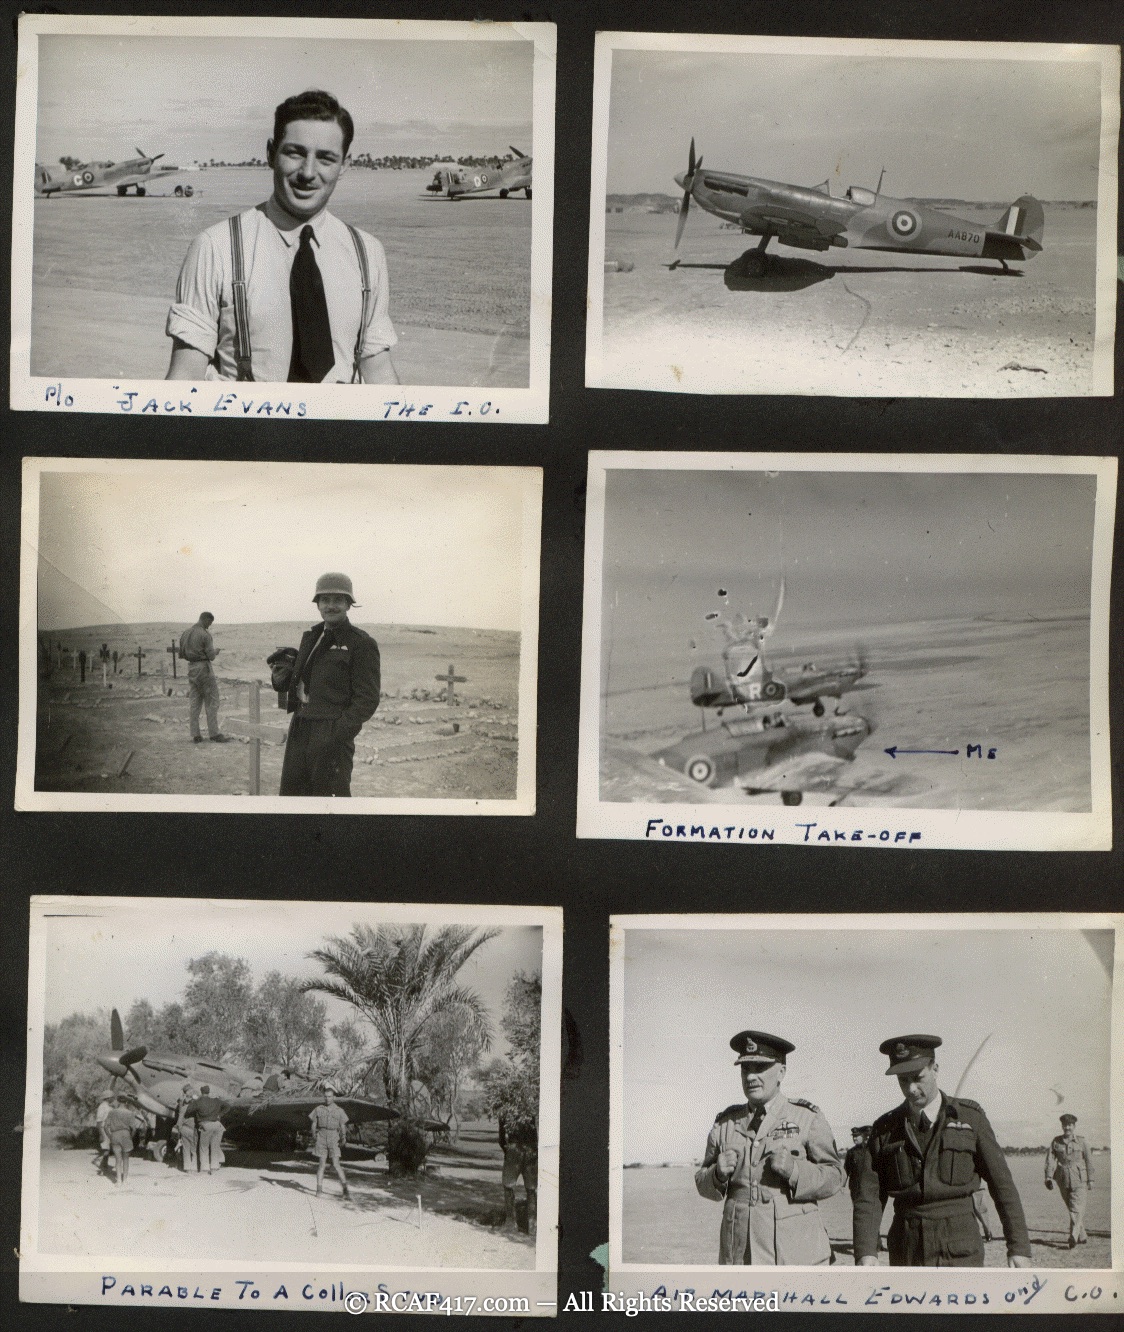
From a page otherwise devoted to squadron personnel: "Formation Take-off," two aircraft
lifting off together, and a badly damaged Spitfire resting under a palm tree with ground
crew working around it, partly captioned "Parable to a Coll[apsed?] S[tud?]." See the full
page, including the personnel portraits, in context in
Chapter Three.
Sicily, 1943
By August 1943, the squadron had moved to Lentini West, Sicily, following the Allied invasion,
and had begun converting to the Spitfire Mk VIII.
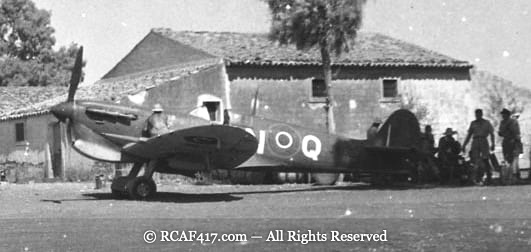
A Supermarine Spitfire Mk. V of 417 Squadron near Lentini, Sicily, August 26, 1943 — not
long after the squadron's move to Lentini West following the invasion of Sicily. (Library
and Archives Canada photo, MIKAN no. 4997400.) See it in context on the
Squadron History page.
B-25s in Italy
After his June 1943 transfer to the USAAF, Koplitz traded his Spitfire for a North American
B-25 Mitchell medium bomber with the 340th Bomb Group. The two photographs below are tied to a
documented, dated 340th Bomb Group event; the group's larger collection of nose art, crew
photos, and strike/reconnaissance prints — none confirmed as Koplitz's own aircraft or
missions — now lives on its own Nose Art Archive page.
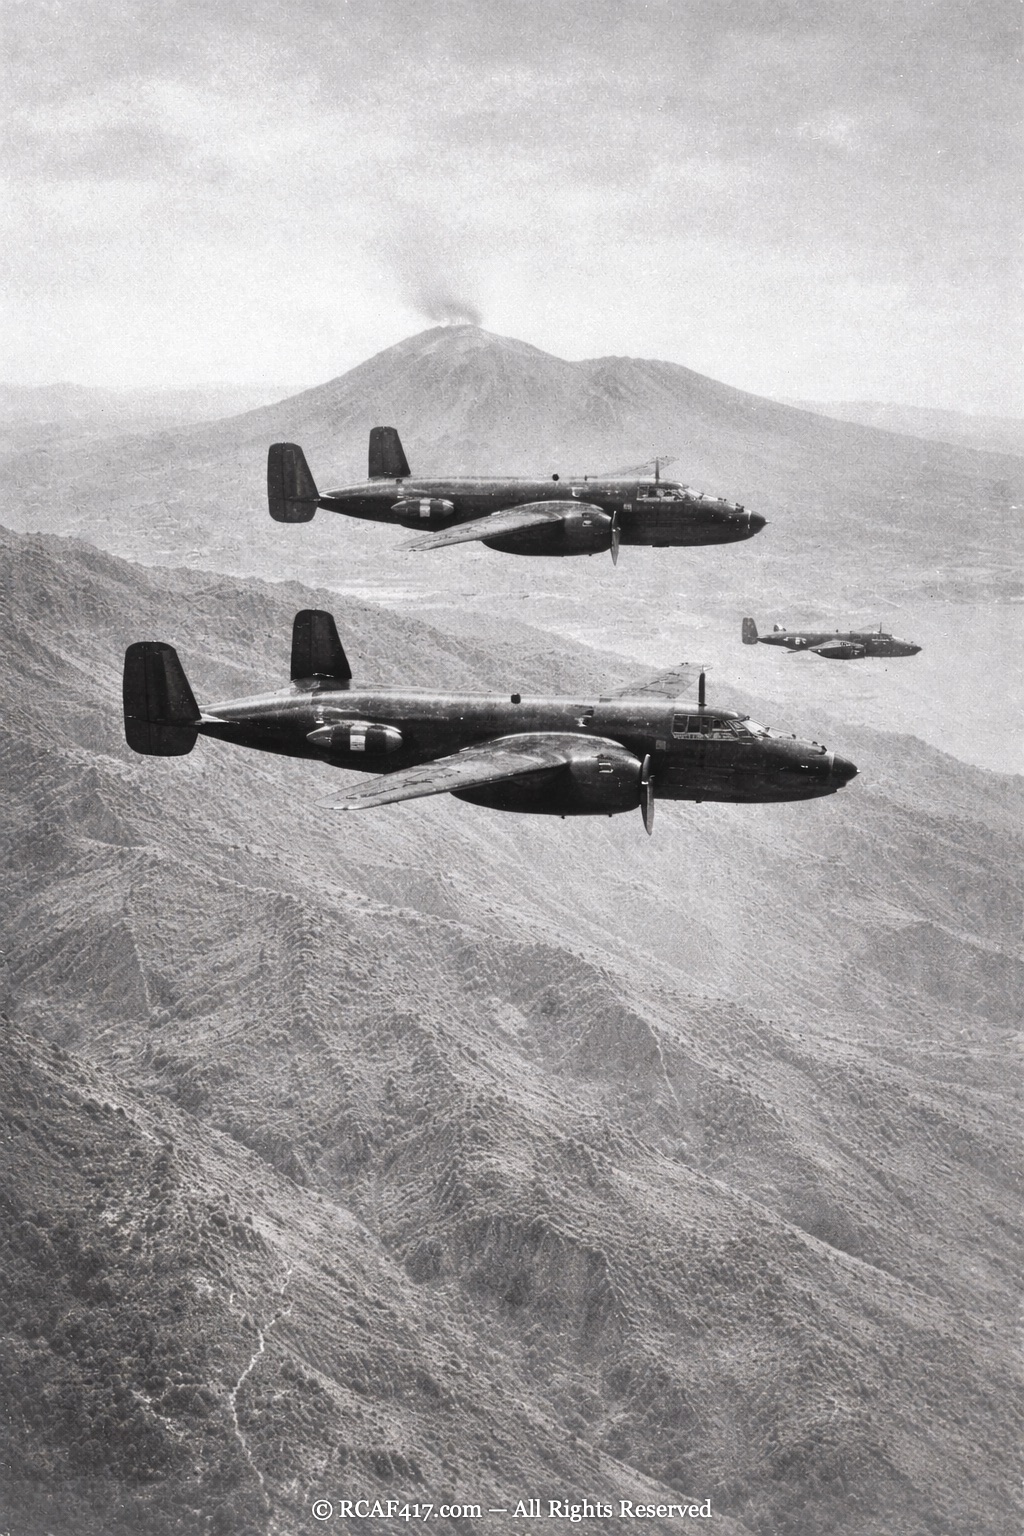
A B-25 formation with Mount Vesuvius quiet in the background, likely photographed before the
volcano's March 1944 eruption. See it paired with the "during" photo below in
Chapter Four.
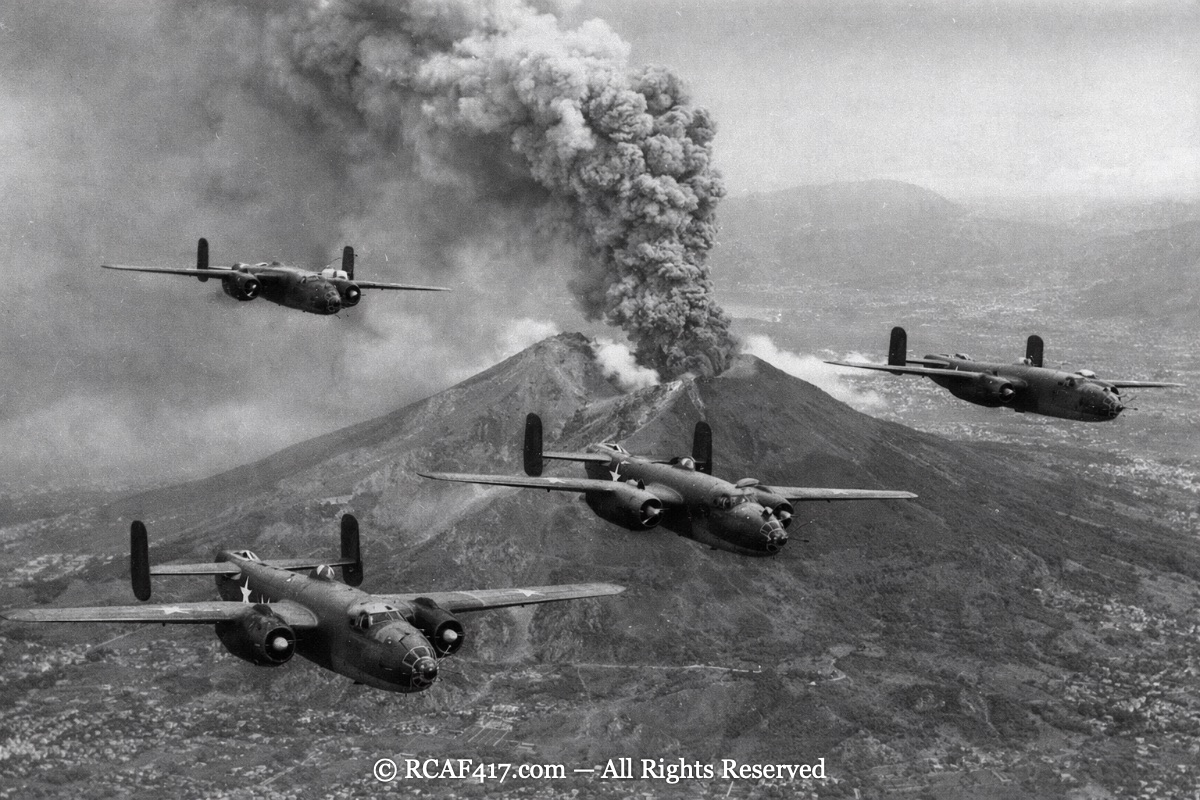
Four B-25s in formation as Mount Vesuvius vents a heavy ash column — likely the March 1944
eruption that damaged a number of the 340th Bomb Group's own aircraft on the ground near
Pompeii. See it in context in Chapter Four.
After the War
Koplitz's connection to aircraft didn't end with his 1946 separation — he spent much of his
postwar career in aviation maintenance and instruction.
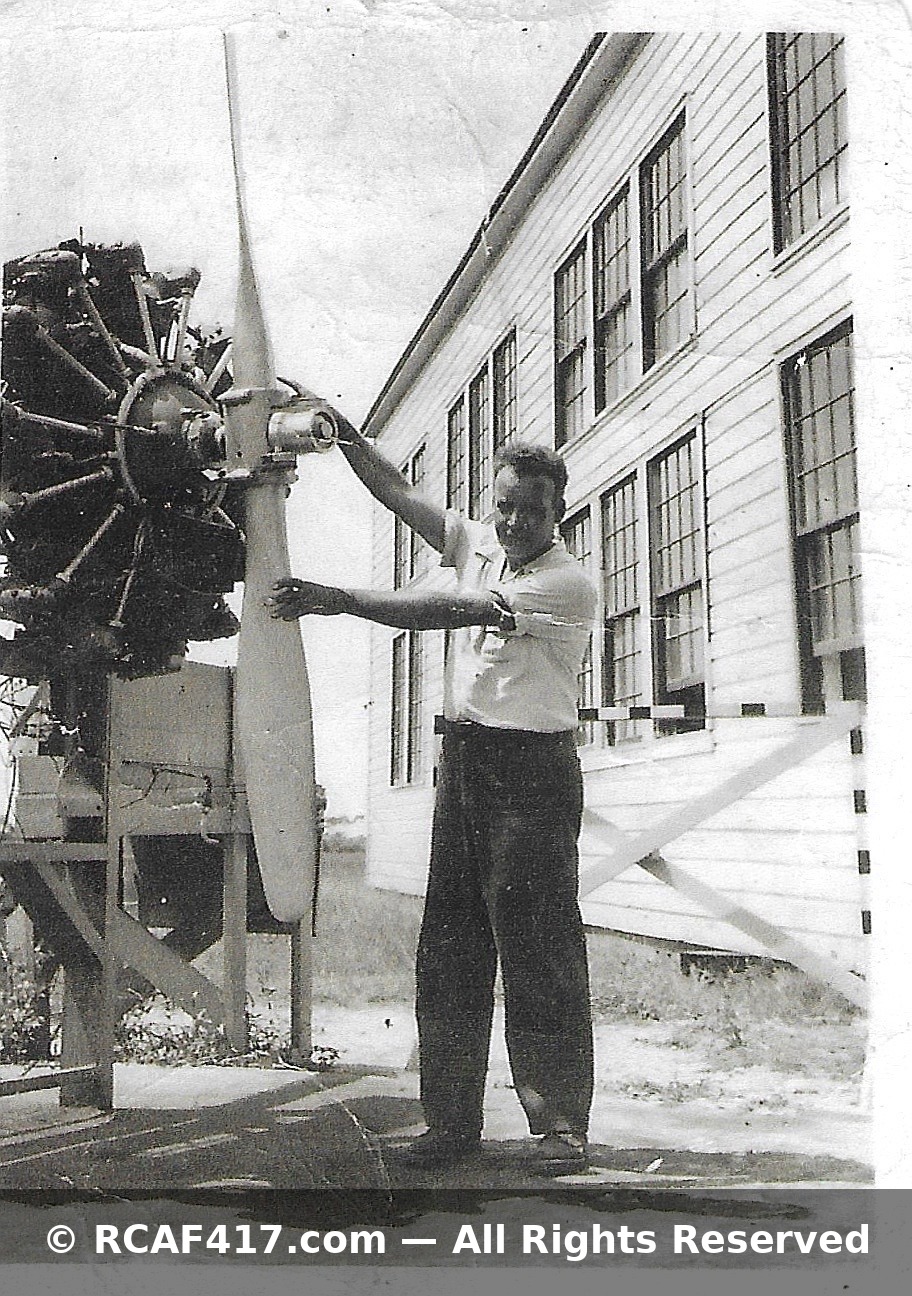
Koplitz beside a radial aircraft engine at the Air Force Airframe & Engine School,
Sarasota Municipal Airport, summer 1951 — a peacetime counterpart to the Merlin engines he'd
worked around a decade earlier in the desert. See it in context in
Chapter Eight: Life After the War.
This page will grow as more of the family archive is scanned and identified. Most of the
album pages above are courtesy of Guy A. Wood Jr.'s wartime scrapbook, donated to this
archive by his family.